Shopify supports click and collect natively through its Pickup in store feature, and you can enable it today from Settings > Shipping and delivery. No third-party app is required for a basic setup. The benefit is straightforward: customers buy online and collect from your store, which cuts last-mile delivery costs, reduces returns, and gives your staff a chance to upsell at the point of handoff.
Here is what to do first:
- Go to Settings > Shipping and delivery > Additional delivery methods > Pickup in store
- Activate pickup for each location that will fulfil orders
- Set a processing time and write your pickup instructions
- Enable Ready for pickup email and SMS notifications
- Test the full flow with a real order before going live
Pro Tip: Treat pickup as a core fulfilment channel from day one, not a bolt-on. Enable store transfers at the same time so customers never see a location listed as available when your stock is actually sitting at a different branch.
Key takeaways
Shopify's native Pickup in store feature covers the full click and collect workflow for most UK merchants, from admin setup to POS handoff, and it requires no third-party app to get started.
| Point | Details |
|---|---|
| Enable pickup per location | Go to Settings > Shipping and delivery and activate pickup for each fulfilling location. |
| Set processing times and instructions | Clear timings and pickup instructions reduce customer queries and no-shows. |
| Test end-to-end before going live | Run a real test order through checkout, POS, and notifications before your first customer collects. |
| Train staff on the POS workflow | Add the Pickup all items tile and run staff through the pick-pack-notify-handoff process. |
| Jarvisandco for managed setup | Jarvisandco handles Shopify theme changes, checkout UX and notification templates for UK merchants who want a faster, cleaner launch. |
Table of Contents
- What do you need in place before enabling click and collect?
- How do you enable click and collect in the Shopify admin?
- How does pickup availability show on product pages and at checkout?
- How do store transfers let you offer pickup from any location?
- How do you manage pickup orders in Shopify POS?
- What notifications should you send, and how does curbside pickup work?
- What are the most common click and collect pitfalls, and how do you fix them?
- When is native Shopify pickup enough, and when do you need an app?
- Jarvisandco's practical launch checklist for UK merchants
- Why click and collect matters more than most UK retailers realise
- How Jarvisandco can help you set up click and collect on Shopify
- Useful resources for further reading
What do you need in place before enabling click and collect?
Getting the prerequisites right saves a lot of headaches later. Here is what must be ready before you switch pickup on.
Locations and permissions
- At least one active Shopify location must be set to fulfil online orders. You configure this under Settings > Locations.
- Staff who will manage pickup orders need the correct permissions in the Shopify admin. At minimum, they need access to orders and, if using Shopify POS, the relevant POS permissions.
Inventory
- Every product you want to offer for pickup must have accurate stock counts at the pickup location. Shopify will only show a location as available when every item in the cart is in stock there.
- If you run multiple locations, decide upfront whether to enable store transfers. Without them, customers will not see pickup as an option when stock is held elsewhere.
- Using a dedicated inventory management system alongside Shopify helps keep stock counts accurate across locations, which is the single biggest cause of phantom availability.
Plan and checkout compatibility
- Pickup in store is available on all paid Shopify plans. Shopify Plus merchants have additional flexibility for checkout customisation and advanced routing.
- Your store must be using Shopify's current checkout. Legacy checkout versions may not surface pickup options correctly.
Notifications
- Enable Ready for pickup notifications in your notification settings. Without this, customers will not know their order is ready to collect, and you will end up fielding calls.
- Configure both email and SMS where possible. SMS has a higher open rate for time-sensitive messages.
Tax and VAT responsibility
Shopify is a commerce platform, not a tax authority. Merchants remain responsible for declaring income and managing VAT under HMRC rules, regardless of how orders are fulfilled. If you are VAT-registered, pickup orders are treated the same as any other sale.
Pro Tip: Check your location settings before anything else. A common mistake is having a location active in Shopify but not set to fulfil online orders, which means pickup will never appear at checkout.
How do you enable click and collect in the Shopify admin?
Follow these steps in order. The whole process takes under 15 minutes for a single location.
- In your Shopify admin, go to Settings > Shipping and delivery.
- Scroll to Additional delivery methods and click Pickup in store.
- Select the location you want to activate and toggle on Let customers pick up orders directly at this location.
- Set a processing time (for example, "Ready in 2 hours" or "Ready same day"). This appears at checkout so customers know when to arrive.
- Write your pickup instructions. Include your address, parking details, opening hours, and what customers should bring (order confirmation, ID if needed).
- Save your changes.
- To show pickup availability on product pages, go to your theme editor and enable the Pickup availability section on the product page template. The Dawn theme includes this section by default and it can be toggled on without any code changes.
- Place a test order using a staff email address and a low-value SKU. Go through checkout as a customer, select pickup, and confirm the option appears correctly.
- In the Shopify admin, open the test order, click Mark as ready for pickup, and check that the notification arrives at the email and phone number you used.
Pro Tip: Use a £0.01 test product and your own mobile number to validate both email and SMS notifications before your first real customer collects. It takes five minutes and catches most setup errors.
Once the test passes, your in-store pickup on Shopify is live.
How does pickup availability show on product pages and at checkout?
The default behaviour is straightforward but worth understanding clearly.
At checkout: Shopify shows a pickup location only when every item in the cart is in stock at that location. One out-of-stock item removes the option entirely for that basket. This is intentional, but it catches merchants off guard when they have mixed-stock situations.
On product pages: You can show a "Pick up available at [store name]" message directly on the product detail page. This reduces checkout friction because customers know before they add to basket whether pickup is possible. Enable this through the theme editor. For Dawn-based themes, the pickup availability section is already built in.
Controlling what appears
- Exclude specific products or collections from pickup if they are bulky, perishable, or restricted. Do this by removing those products from the pickup location's fulfilment settings.
- Consider a stock buffer of 5–10% on fast-moving SKUs. If your actual stock is 10 units, set your available quantity to 9. This reduces the chance of an oversell between the time a customer places a pickup order and the time staff pull the item. Shopify's best-practice guidance supports this approach for high-velocity products.
| Scenario | What the customer sees |
|---|---|
| All items in stock at pickup location | Pickup option shown at checkout |
| One item out of stock at pickup location | Pickup option hidden at checkout |
| Store transfers enabled, stock at another location | Pickup shown with longer processing time |
| Product excluded from pickup | Pickup option not shown for that product |
Pro Tip: Add a short line to your product page pickup message, such as "Usually ready in 2 hours." Customers respond well to specificity. Vague messages like "Available for pickup" do not build the same confidence.
Improving your product page messaging around pickup availability is one of the quickest ways to increase collection uptake without touching your checkout.
How do store transfers let you offer pickup from any location?
Store transfers solve the most common click and collect problem: a customer wants to collect from your town-centre shop, but the stock is at your warehouse.

When you enable store transfers in the Shopify admin, Shopify can route stock from another location to the pickup store. If no single location holds all items in the order, Shopify creates multiple transfers automatically.
Setting up store transfers
- Go to Settings > Shipping and delivery > Pickup in store and enable Store transfers for the relevant location.
- Set a separate processing time for transfer orders, for example "Ready in 2–4 days." This is critical. Customers need to know upfront that their order will not be ready in two hours.
- When a transfer order comes in, create the transfer in the Shopify admin under Products > Transfers, select the source and destination locations, and add the items.
- Ship or hand-carry the stock to the pickup location.
- Receive the transfer at the destination location to update inventory.
- Mark the order as Ready for pickup and send the notification.
| Fulfilment type | Speed | Complexity | Inventory visibility | Customer expectation |
|---|---|---|---|---|
| Standard pickup | Fast (same day) | Low | Must be in stock at pickup location | Immediate or same-day collection |
| Store transfer | Slower (2–4 days) | Medium | Stock moved from another location | Planned collection, longer wait |
| Curbside pickup | Fast | Low to medium | Same as standard pickup | Drive-up collection, arrival signal needed |
The transfer workflow adds steps, but it lets you offer pickup across your full catalogue rather than only what is physically on the shelf at one location.
How do you manage pickup orders in Shopify POS?
Your POS setup is where pickup either runs smoothly or falls apart. The key is giving staff a clear, repeatable process.
Add the Pickup all items tile to your POS smart grid. This is the single most effective change you can make. Staff can see pending pickup orders at a glance without searching through the order list. Set this up in the Shopify POS app under Smart grid > Edit.
The Shopify POS pickup workflow runs as follows:
- A new pickup order appears in the POS smart grid tile.
- Staff open the order, pick the items from the shelf, and pack them.
- Mark the order as Ready for pickup in POS. This triggers the customer notification automatically.
- Customer arrives, provides their name and order number.
- Staff confirm the handoff and mark the order as Picked up (fulfilled) in POS.
A few operational points:
- Only staff with fulfilment permissions should mark orders as ready or fulfilled. Accidental fulfilment is a common error that triggers notifications prematurely.
- You can also create pickup orders at the register. If a customer walks in, pays in person, and wants to collect a different item later, use the POS to create the order with pickup as the fulfilment method.
- Keep a printed or digital log of orders handed off, especially during busy periods. POS records the fulfilment, but a physical log helps with disputes.
Pro Tip: Set up a dedicated pickup station near the entrance, separate from your main till. Label it clearly. Customers who know exactly where to go collect faster, and your queue moves more smoothly.
What notifications should you send, and how does curbside pickup work?
A well-timed notification sequence removes almost all customer anxiety around pickup orders.
The four notifications to send:
- Order confirmation (automatic): confirms the order was placed and pickup was selected.
- Processing update (optional but useful): lets the customer know their order is being prepared.
- Ready for pickup: the most important message. Include your store address, parking details, opening hours, and what to bring. Send this the moment staff mark the order ready in POS.
- Pickup confirmation: sent automatically when the order is marked as fulfilled.
Curbside pickup
Curbside is similar to standard pickup but the customer stays in their vehicle. Shopify's guidance on curbside recommends keeping the arrival process as simple as possible. The most reliable method is a phone call or text to a dedicated store number when the customer arrives. Geofencing tools exist, but a staffed call/text workflow is faster to set up and just as effective for most UK retailers.
For curbside to work well:
- Specify a parking bay number in your pickup instructions (for example, "Park in bay 3 at the front of the store and call 01234 567890").
- Keep staff steps to a minimum: receive the call, grab the order, walk to the car.
- Avoid vague instructions. "Wait outside" produces blocked entrances and frustrated customers.
Proof of collection
Collect the customer's name and order number at minimum. For higher-value orders, ask for photo ID or scan a QR code from the order confirmation email. Only collect what you genuinely need. Under UK data protection expectations, you should not retain proof-of-collection records longer than necessary or store them in an unsecured format.
Pro Tip: Add one optional upsell line to your Ready for pickup SMS, for example: "Your order is ready. While you're here, ask about our gift wrapping service." Keep it brief and low-pressure. It increases average order value without feeling pushy.
Tracking the AOV lift from pickup orders is straightforward with server-side tracking configured correctly in Shopify.
What are the most common click and collect pitfalls, and how do you fix them?
Most problems with Shopify pickup come down to inventory accuracy, missed notifications, and unclear handoff processes.
Daily operations checklist:
- Reconcile inventory at the start and end of each day
- Check the POS smart grid tile for pending pickups before opening
- Confirm notification templates are active in admin settings
- Run a test pickup order at least once a week during the first month
- Review any unfulfilled pickup orders older than 24 hours
Common pitfalls and fixes:
| Symptom | Likely cause | Immediate fix | Prevention |
|---|---|---|---|
| Pickup not showing at checkout | Item out of stock at location | Update stock count or enable transfers | Daily inventory reconciliation |
| Customer did not receive Ready notification | Notification not enabled or wrong contact | Check admin notification settings | Test notifications before going live |
| Wrong items handed to customer | No pick-and-pack process | Introduce printed pick slips | Staff training and labelled pickup station |
| Transfer not received at pickup location | Transfer not marked as received | Receive transfer in admin immediately on arrival | Set a transfer receiving checklist |
| Oversell on pickup items | No stock buffer | Add a 5–10% buffer on fast-moving SKUs | Review buffer monthly |
Effective click and collect relies on real-time inventory accuracy. Without it, customers face phantom availability, which erodes trust quickly and is very hard to recover from.
Costs and returns
Staff time per pickup is typically lower than packing and posting an order, but only if your pickup station is organised. A disorganised process can take longer than despatch. The revenue opportunity at handoff, whether a verbal upsell or a printed insert, can offset the staff cost entirely.
Click and collect reduces return rates because customers inspect items before leaving the store. For apparel merchants, pairing pickup with fit guidance can reduce returns further. A practical guide to reducing clothing returns covers this in more detail.
For returns at point of pickup: set a clear policy before launch. If a customer wants to exchange on the spot, process the return in POS immediately so inventory updates in real time. Do not let exchanges sit unrecorded.
Pro Tip: Shopify Flow can automate tagging and internal routing for pickup orders, reducing the manual steps your staff need to take. If you are on a Shopify plan that includes Flow, set up a basic automation before you go live.
When is native Shopify pickup enough, and when do you need an app?
For most UK merchants with one or two locations and standard opening hours, Shopify's native pickup is sufficient. You do not need an app to get started.
Stay native if:
- You have straightforward pickup windows (same day or next day)
- You do not need customers to book specific time slots
- Your locations are fixed and well-known to customers
- Your team can manage pickup notifications manually
Consider an app or custom development if:
- You need customers to select a specific pickup time slot (for example, a food retailer with 30-minute collection windows)
- You want geofencing or an "I'm here" arrival button integrated into your checkout
- You run a complex multi-location operation with custom routing rules
- You need a branded pickup portal separate from the standard checkout
Native vs app vs custom: a quick comparison
- Native Shopify pickup: free, fast to set up, covers the majority of use cases, limited scheduling flexibility.
- Third-party app: adds time-slot booking, arrival signalling or advanced notifications; monthly cost; requires ongoing maintenance and compatibility checks after Shopify updates.
- Custom development: maximum flexibility, matches your exact brand and workflow; higher upfront cost; best suited to Shopify Plus merchants or those with genuinely complex requirements.
For developers building bespoke routing, Shopify's developer documentation on local pickup and delivery option generators covers the technical implementation in detail.
Jarvisandco can handle theme changes, checkout UX updates, and bespoke notification templates without the overhead of a full custom build. That sits between native and full custom, and it is often the right level for growing UK retailers.
Pro Tip: Before paying for an app, check whether Shopify Flow covers your automation needs. Many merchants pay for a notification app when a Flow workflow would do the same job at no extra cost.
Jarvisandco's practical launch checklist for UK merchants
Use this as your go-to reference for a clean, low-risk launch.
Week-by-week timeline
- Week 1: Admin setup — Enable pickup per location, set processing times, write pickup instructions, configure notifications.
Sample Ready for pickup SMS (UK tone):
Sample curbside arrival instruction (for pickup confirmation email):
Launch day checklist
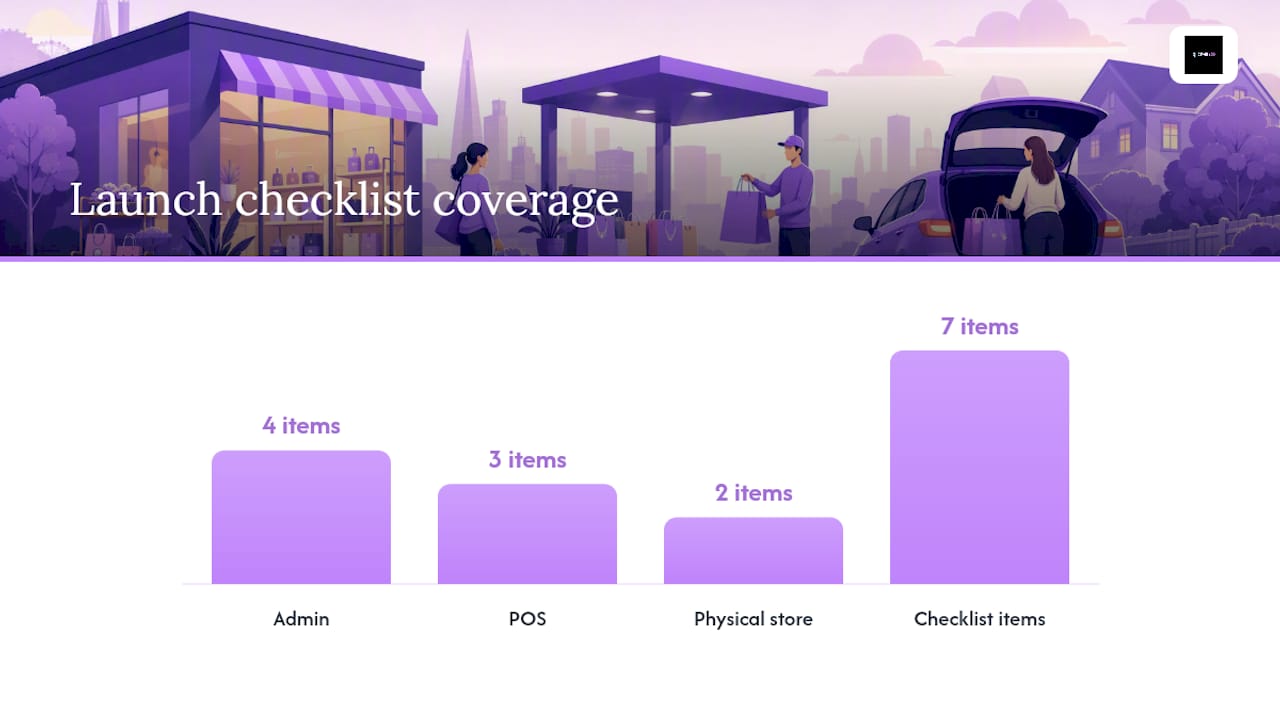
| Check | Admin | POS | Physical store |
|---|---|---|---|
| Pickup enabled per location | ✓ | ||
| Processing time set | ✓ | ||
| Notifications active | ✓ | ||
| Pickup tile on smart grid | ✓ | ||
| Staff trained on handoff flow | ✓ | ||
| Pickup signage in place | ✓ | ||
| Test order completed successfully | ✓ | ✓ | ✓ |
Improving local search visibility alongside your pickup launch helps drive footfall. Local business schema and a well-optimised Google Business Profile make your pickup location easier to find for nearby shoppers.
Pro Tip: Do not skip the soft launch phase. Running pickup on a limited product range for one week before full rollout gives your team time to find gaps in the process without risking your entire order volume.
Why click and collect matters more than most UK retailers realise
There is a tendency to treat pickup as a convenience feature you bolt on when a customer asks for it. That is the wrong way to think about it.
The pickup moment is one of the few times a purely online transaction becomes a physical, human interaction. Your staff are there. The customer is there. The order is in their hands. That is an opportunity that delivery will never give you. Retailers who treat it as a core channel, not an afterthought, see it in their numbers: lower returns, higher basket values at the point of collection, and customers who come back because the experience was good.
The operational side is genuinely straightforward on Shopify. The admin setup takes minutes. The POS workflow is logical. What takes effort is the discipline: keeping inventory accurate, training staff consistently, and writing pickup instructions that are actually useful rather than generic. Most of the problems we see with click and collect on Shopify are not technical. They are process gaps that a good checklist and a one-hour staff briefing would fix.
One thing worth saying plainly: do not let the availability of apps convince you that the native setup is inadequate. For the majority of UK retailers, it is not. Start native, run it for a month, and only add complexity when you have a specific problem that native cannot solve.
How Jarvisandco can help you set up click and collect on Shopify
Getting pickup live on Shopify is one thing. Getting it to work well, with clear product page messaging, a checkout that converts, and a POS setup your staff actually use, is where the detail matters.

Jarvisandco works with UK merchants to build and improve Shopify stores from the ground up. That includes Shopify store design, POS integration, checkout UX, notification template copywriting, and local SEO to bring nearby shoppers to your door. We have helped businesses across the UK set up pickup as a proper fulfilment channel, not just a checkbox in the admin.
If you want a managed launch, a theme update that surfaces pickup availability clearly on your product pages, or simply a second pair of eyes on your current setup, we are here to help. View our Shopify services or get in touch for a quote and we will get back to you quickly.
Useful resources for further reading
Official Shopify documentation
- Setting up pickup in store for online orders - Shopify Help Center
- Managing pickup in store orders in Shopify POS - Shopify Help Center
- How Click and Collect Works + Examples for 2025
- Boost Foot Traffic and Sales With Instore Pickup (2026) - Shopify
- Curbside pickup — Shopify blog
- Local pickup and delivery option generators — Shopify developer docs
- Dawn theme — Shopify Themes
Partner resources
- Inventory management for SMBs — practical guide to keeping stock counts accurate across locations.
- Reducing clothing return rates — techniques to lower returns, relevant for apparel merchants using pickup.
- Server-side tracking for Shopify — how to measure pickup order AOV and conversion accurately.
Jarvisandco resources
- Shopify services — our Shopify design and development offering for UK merchants.
- Shopify conversion rate benchmarks — UK data and tips to improve pickup uptake through better PDP and checkout UX.
- Local business schema guide — how to use structured data to improve local visibility for your pickup locations.